
WhatsApp Setup
Connect your WhatsApp Business account to enable the AI Agent.
Video Tutorial: Connect WhatsApp with Meta Embedded Signup
Watch this step-by-step video guide to learn how to connect your WhatsApp Business account to Replyk in under 2 minutes using Meta's official Embedded Signup flow.
Official Meta Connection — Embedded Signup (Recommended)
The Official Meta Connection uses Meta's official Embedded Signup dialog. It automatically links your Meta Business Account, grants necessary permissions, configures webhooks, and connects your phone numbers in just a few clicks—no manual API key copy-pasting required.
Start Connection in Replyk
- Go to Business Settings → WhatsApp tab in your Replyk dashboard.
- Click Connect with Facebook to launch Meta's secure Embedded Signup modal.
Log In & Authorize Meta Account
- Log in to the Facebook account associated with your Meta Business Portfolio.
- Review and confirm the permissions requested by Replyk (WhatsApp Business Management & Messaging).
Select or Create Business & WhatsApp Profile
- Select your existing Meta Business Portfolio or create a new one.
- Select your existing WhatsApp Business Account (WABA) or create a new profile.
Register & Verify Phone Number
- Select the phone number you wish to use for WhatsApp Business communications.
- If adding a new number, enter the 6-digit verification code sent by Meta via SMS or phone call.
Select Phone Numbers & Complete Setup
- After closing the Meta popup, Replyk displays all available phone numbers found on your WhatsApp account.
- Select the number(s) you want to activate for your business according to your plan limit, then click Connect.
- Replyk exchanges token credentials and sets up webhooks automatically. Your AI Sales Agent is now ready!
Manual Connection (Meta System User — Advanced)
The access token comes from a Meta Business system user, not from the WhatsApp API Setup page. System users issue permanent tokens that never expire.
Create a System User in Meta Business Portfolio
- Go to business.facebook.com → your business portfolio.
- Open Settings → Users → System users.
- Click + Add.
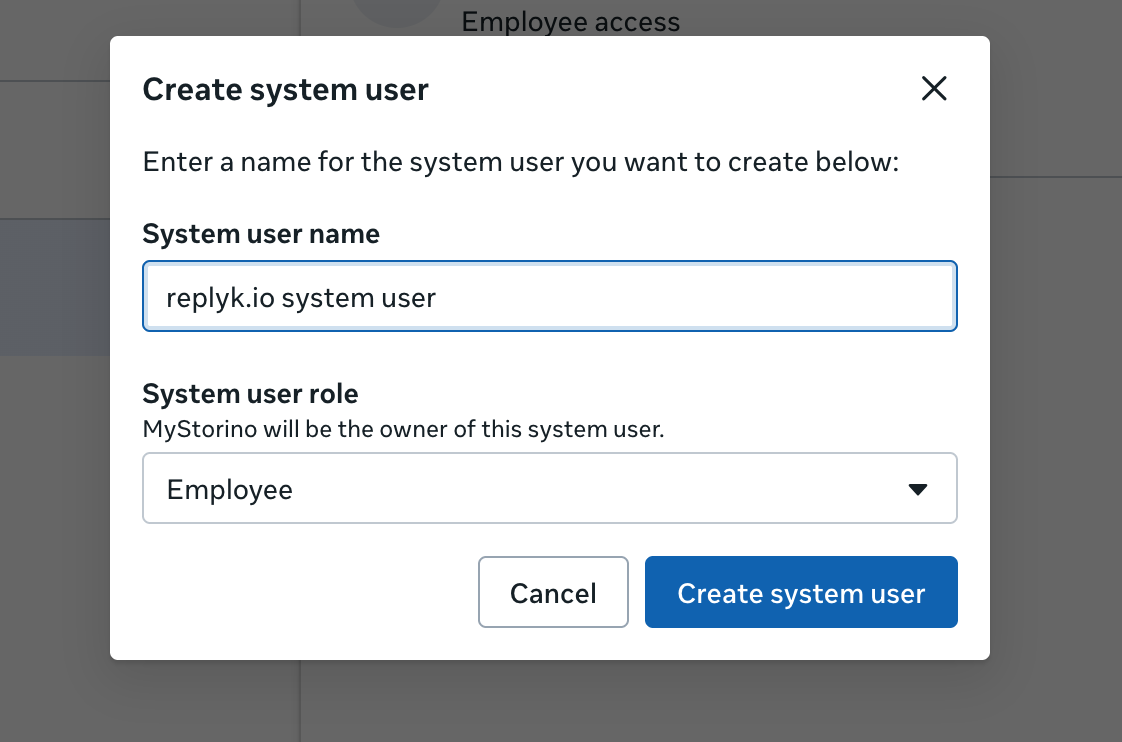
- Enter a name (e.g.
replyk.io system user) and set the role to Employee. - Click Create system user.
Assign App Assets to the System User
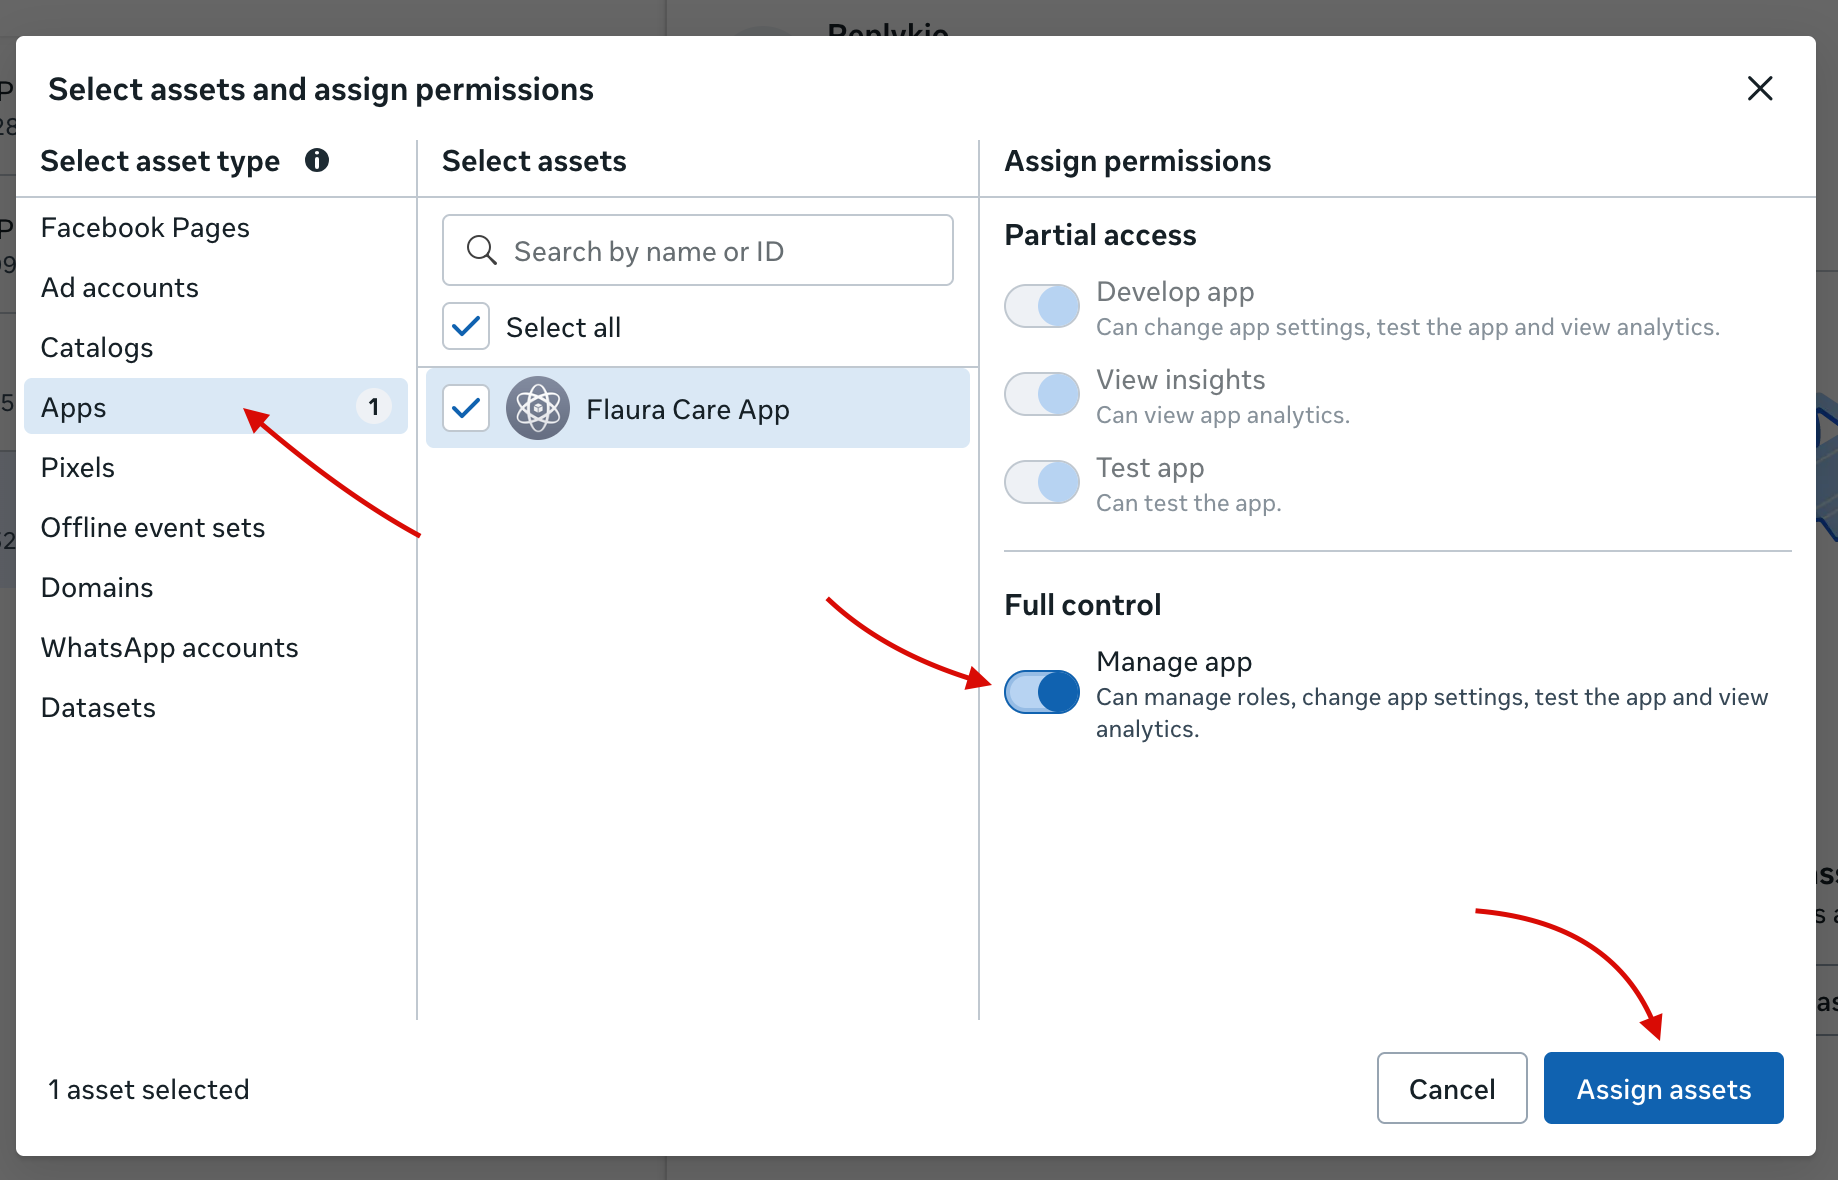
With the system user selected, click Add assets to grant access to your Meta app.
- Select the asset type: Apps.
- Select your Meta app from the list.
- Under Full control, enable Manage app.
- Click Assign assets.
Generate a Permanent Access Token
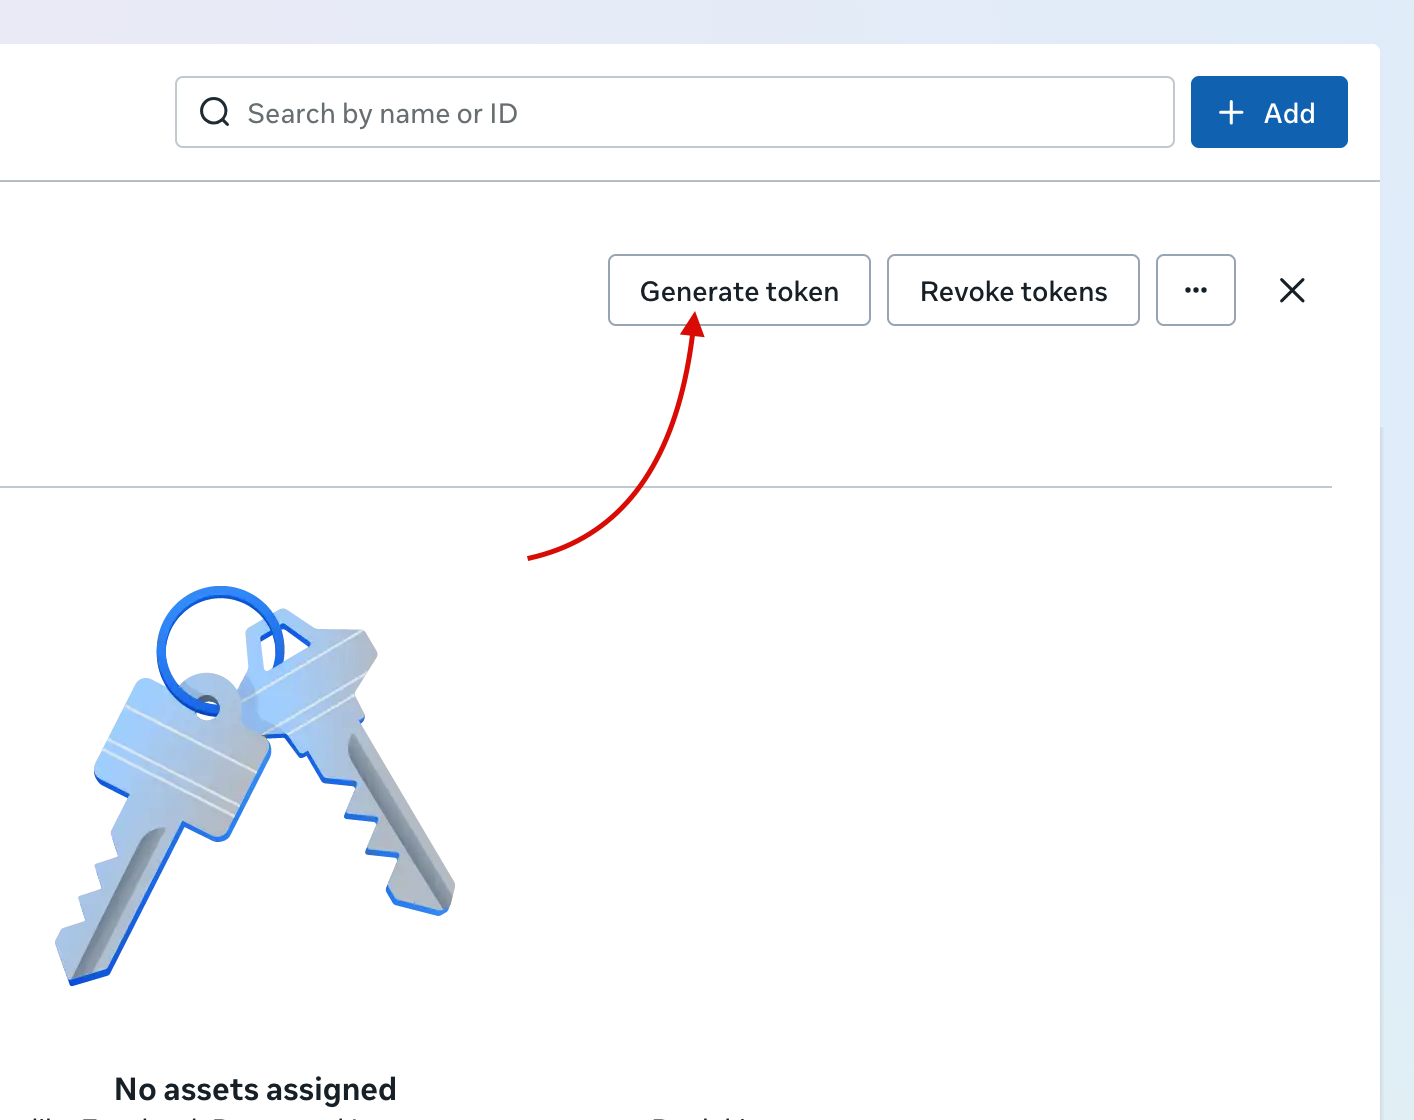
Click the Generate token button on the system user's row.
3a. Select your Meta App
Choose your Meta app and click Next.
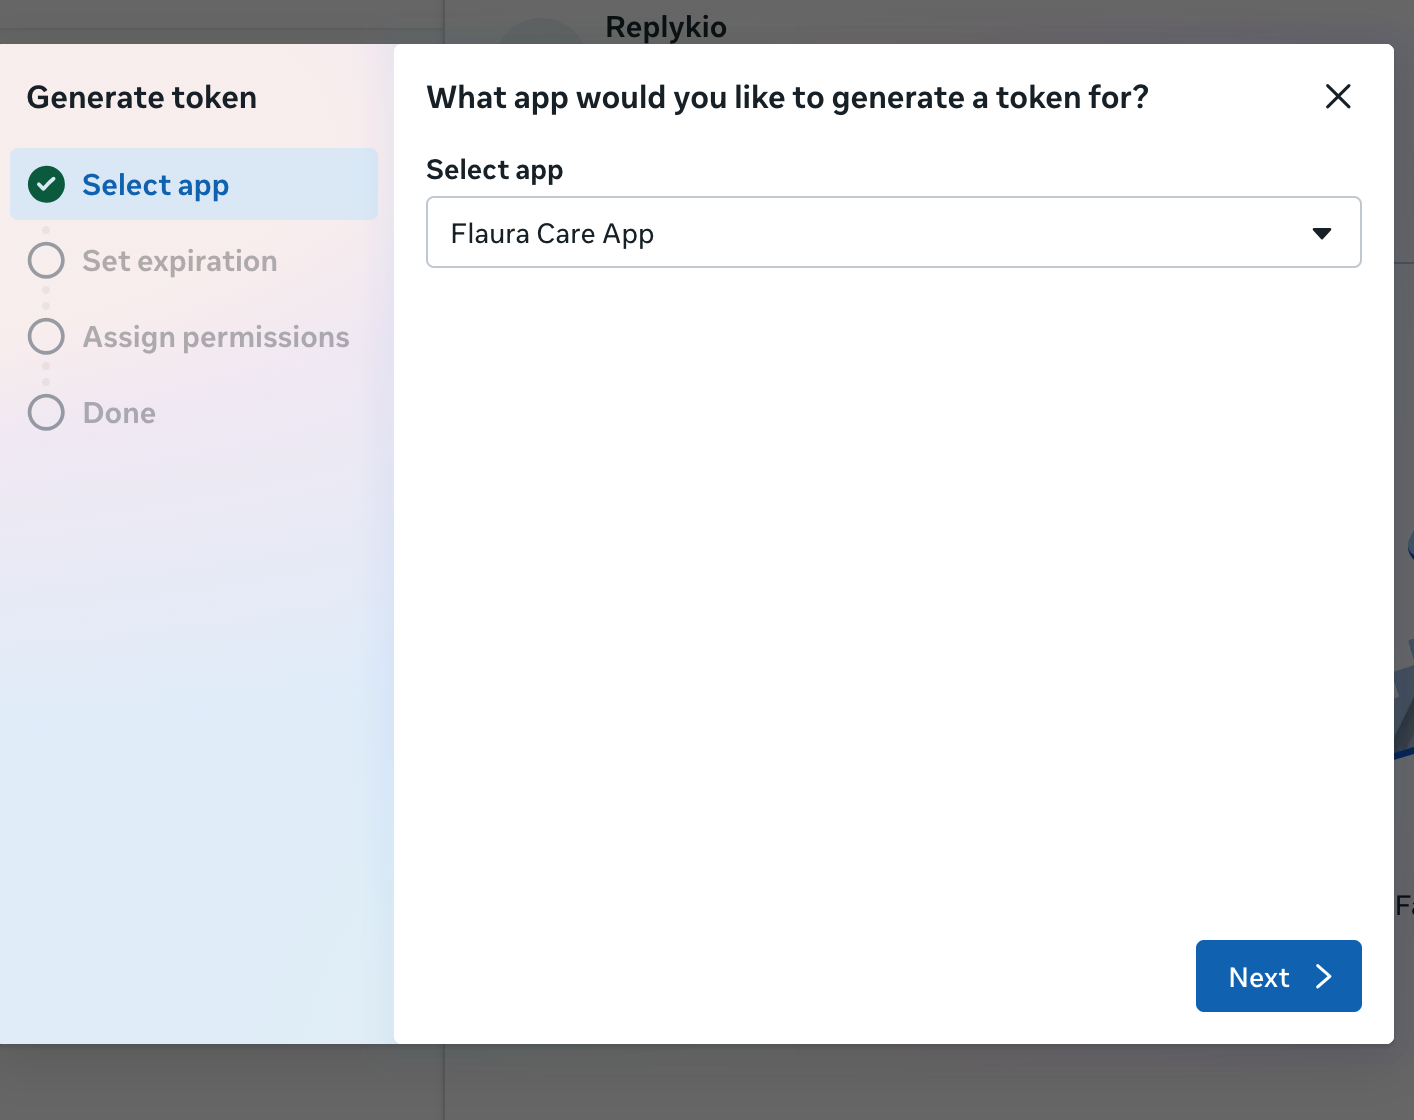
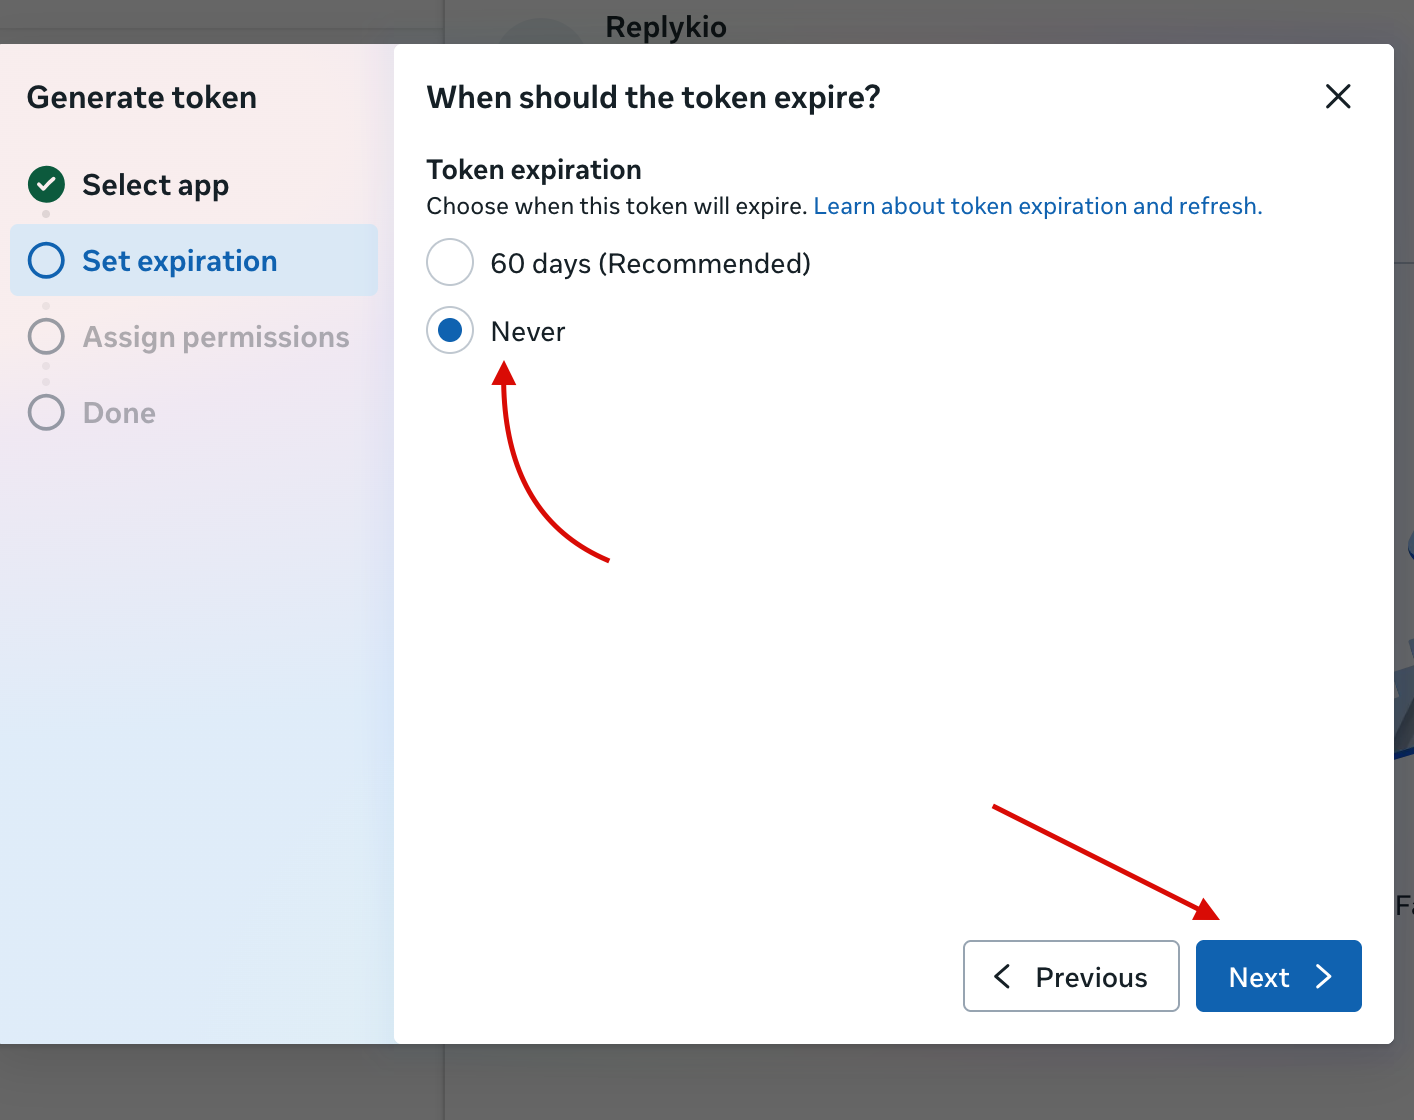
3b. Set Expiration to Never
Select Never so the token never expires.
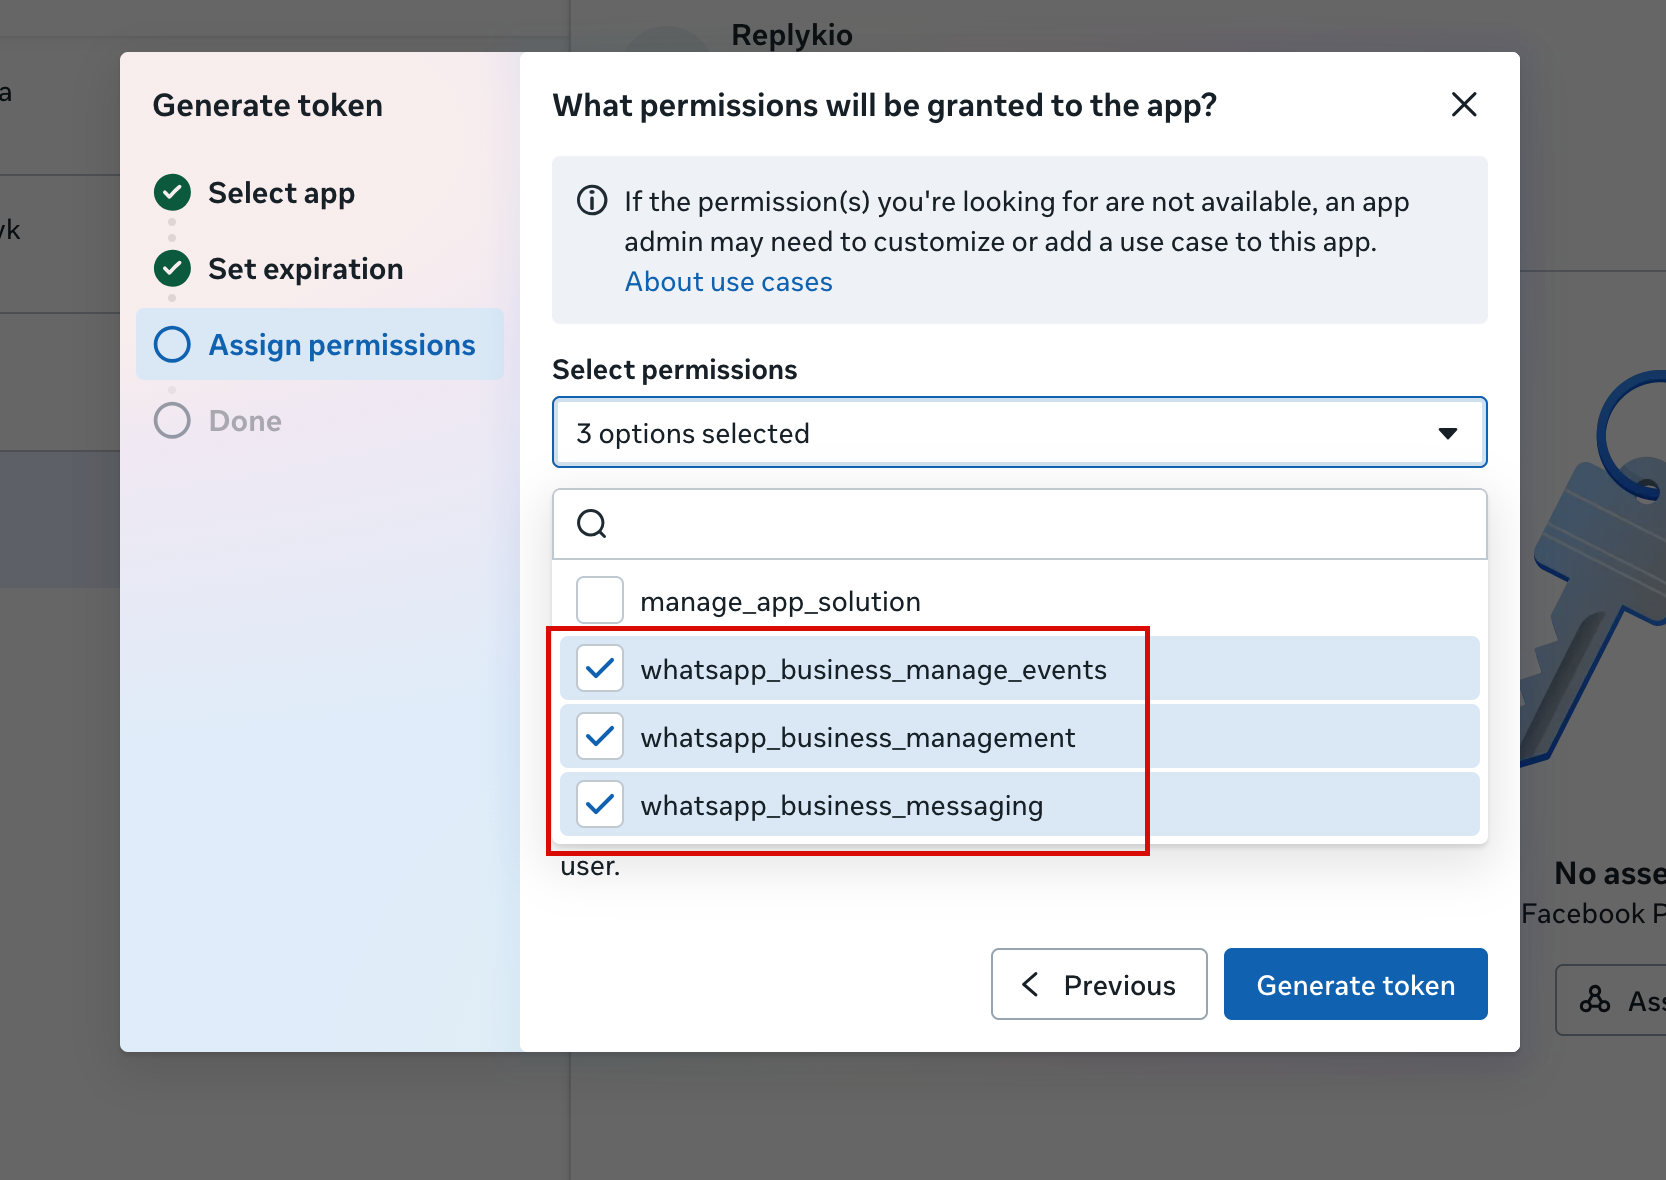
3c. Assign Permissions
Select both WhatsApp permissions, then click Generate token:
whatsapp_business_managementwhatsapp_business_messaging
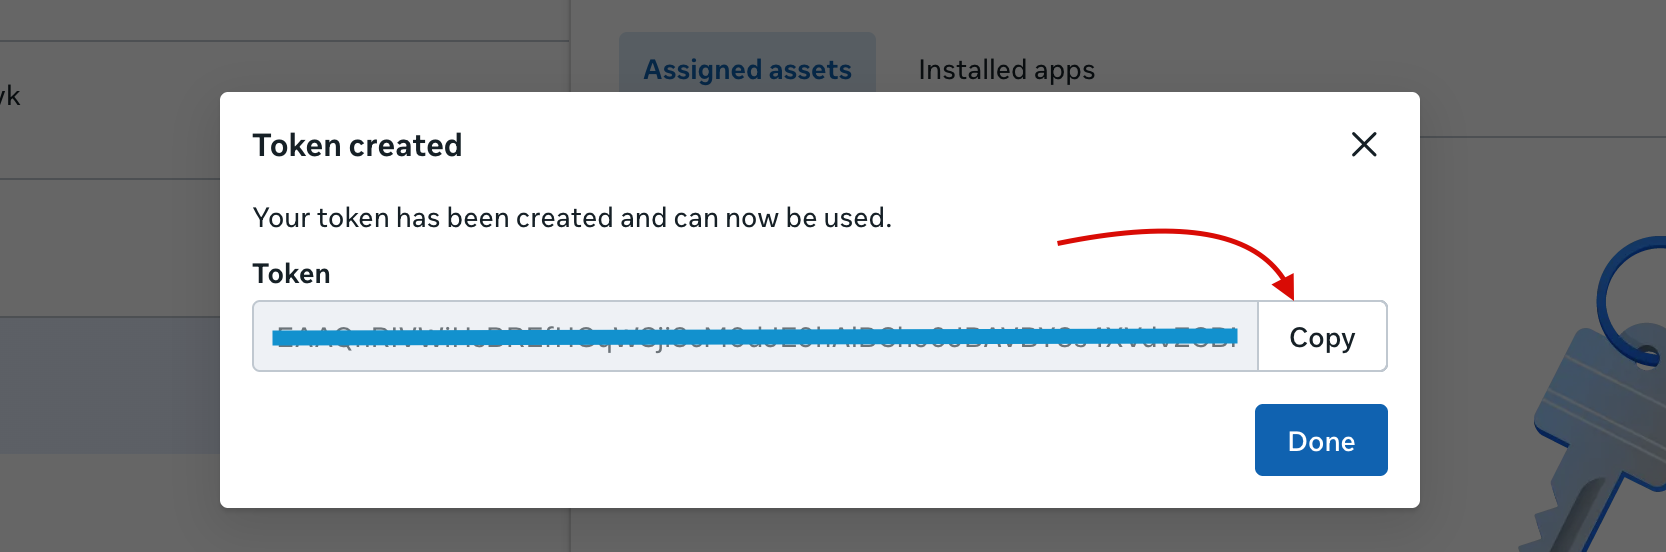
3d. Copy Your Token
Copy and save the token immediately. It will only be shown once.
Get Remaining Credentials from Your Meta App
- WABA ID — In your Meta app dashboard, go to WhatsApp → API Setup. Find the WhatsApp Business Account ID.
- Phone Number ID — Listed under your phone numbers in the API Setup section.
- App Secret — Go to App Settings → Basic and copy the App Secret.
Connect in Replyk
- Go to Business Settings → WhatsApp tab.
- Click Manual Connection.
- Enter your Access Token, App Secret, and WABA ID.
- Click Fetch phone numbers or enter the Phone Number ID manually.
- Optionally enter your 6-digit PIN (if two-step verification is enabled).
- Click Connect WhatsApp.
Configure Webhook in Your Meta App
After connecting, Replyk automatically generates a unique verify token for your connection. You will find the callback URL and the verify token in the Webhook configuration section of your WhatsApp connection status panel — use the copy buttons to grab them.
- In your Meta App, go to WhatsApp → Configuration → Webhooks.
- Set the Callback URL to:
https://replyk.io/api/whatsapp/webhook - Set the Verify Token to the value shown in your Replyk dashboard under Webhook configuration.
- Subscribe to:
messagesandmessage_template_status_update.
Messaging Windows
24-Hour Customer Service Window, Free
Opens when a customer messages you. Send any message type for free while active.
72-Hour Free Entry Point Window
For conversations from Click-to-WhatsApp ads. Template messages only, but free for 72 hours.
Window Closed, Paid Templates Only
After windows expire, only pre-approved template messages can be sent. Meta charges per-message fees.
Still need help?
Our team replies within one business day. Tell us what you're stuck on and we'll guide you through it.